DIY Compost Accelerator: Ignite Your Compost Power
Composting is a natural process that transforms your kitchen and garden waste into a valuable and nutrient-rich food for your garden. It’s a simple way to add nutrient-rich humus to your lawn or garden which fuels plant growth and restores vitality to depleted soil. It’s also free, easy to make, and good for the environment.
But why is composting important? Well, composting helps to keep the high volume of organic waste out of our landfills. Not only does this reduce landfill usage, but it also decreases the need for chemical fertilizers, promoting a greener and more sustainable future.
But composting can be a slow process and it can take several months for compost to mature enough to be used in the garden. This is where a compost accelerator comes into play. In the following sections, you’ll learn all about compost accelerators, why you might need one, and how to make your own DIY compost accelerator at home.
Mastering the Art of Composting: A Comprehensive Guide to DIY Compost Accelerators
Why You Need a Compost Accelerator?
A compost accelerator, as the name suggests, is a substance that speeds up the decomposition process of organic matter. It’s like giving your compost pile a boost to help it break down materials faster and more efficiently.
You might wonder why you would need a compost accelerator when nature can take its course. Well, in an ideal world, where we all have plenty of space and time, letting nature do its work would be the best course of action. However, most of us live in urban or suburban environments where space is limited, and the composting process needs to be as efficient as possible.
Another reason you might need a compost accelerator is the type of waste you’re composting. Some materials are slower to decompose than others. For instance, leaves, twigs, and straw are high in carbon and break down slowly. On the other hand, green materials like vegetable scraps and coffee grounds are high in nitrogen and decompose quickly. A compost accelerator can help balance these elements, ensuring that your compost pile breaks down at an even rate.
Lastly, seasonal changes can also affect the composting process. In colder months, the decomposition process slows down significantly. A compost accelerator can maintain the activity in your compost pile during these colder periods, ensuring that you have a steady supply of compost throughout the year.
Benefits of DIY Compost Accelerators
Making your own compost accelerator at home comes with a number of benefits. Let’s explore some of them:
Cost-Effective
DIY compost accelerators are a cost-effective solution compared to commercial accelerators. The ingredients required are often already available in your kitchen or garden, meaning you don’t have to spend extra money.
Environmentally Friendly
By making your own compost accelerator, you’re not only speeding up the composting process but also reducing waste and minimizing the use of chemical fertilizers. It’s a win for both your garden and the environment.
Control Over Ingredients
When you make your own compost accelerator, you know exactly what goes into it. This means you can avoid any chemicals or additives that are often found in commercial products.
Flexibility
You can tailor your homemade compost accelerator based on the type of waste you’re composting. For instance, if you’re composting lots of dry leaves, you can add more nitrogen-rich ingredients to your accelerator.
Educational
Making your own compost accelerator can be a great educational activity. It’s a chance to learn more about the science of composting and how different materials break down over time.
Satisfaction
There’s a unique satisfaction that comes from creating something useful with your own hands. Plus, seeing your kitchen and garden waste transform into nutrient-rich compost is incredibly rewarding.
Necessary Materials for Your DIY Compost Accelerator
Creating your own compost accelerator at home is relatively straightforward and doesn’t require a lot of materials. Here’s what you’ll need:
Organic Waste
The primary ingredient for any compost pile or accelerator is organic waste. This can be anything from kitchen scraps (fruit and vegetable peels, coffee grounds, eggshells) to yard waste (grass clippings, leaves, small branches). Try to maintain a balance between green waste (high in nitrogen) and brown waste (high in carbon).
Water
Water is essential for the composting process as it helps to break down the organic matter. However, it’s important to find a balance – too much water can drown the microorganisms that help with decomposition.
Air
Oxygen is crucial for the composting process. It helps the microorganisms break down the organic material. Make sure your compost pile is well aerated by turning it regularly.
A Compost Bin or Pile
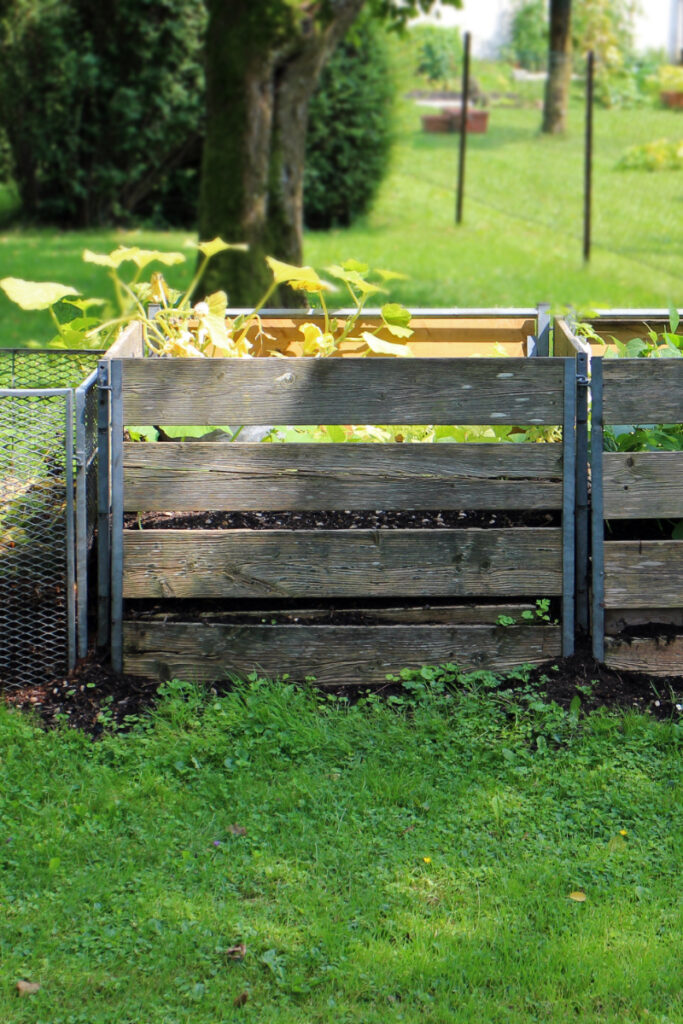
Whether you choose to have a compost bin or just a pile in your backyard depends on the space available to you. A bin can be more efficient and tidy, but a pile works just as well if managed properly.
Nitrogen Source
To speed up the composting process, you’ll need a source of nitrogen. This could be green kitchen waste like vegetable peels, coffee grounds, or even some natural fertilizers like blood meal or bone meal.
Compost Starter
This is an optional ingredient, but it can help jumpstart the composting process. You can use a handful of garden soil or finished compost as a starter.
Step-by-step Guide to Making Your Own Compost Accelerator
Creating your own compost accelerator is a straightforward process that can be accomplished with minimal effort. Follow these steps:
Collect Your Materials
Start by gathering all your organic waste. Remember to maintain a good balance between green (nitrogen-rich) and brown (carbon-rich) materials.
Choose Your Compost Bin or Spot
Decide where you want your compost pile to be. If you have a compost bin, this can be anywhere in your yard. If not, choose a spot that’s out of the way but easy to access.
Start Your Compost Pile
Start your compost pile with a layer of brown materials like leaves or straw to help with aeration and drainage.
Add Your Green and Brown Materials
Add your green and brown materials in layers, starting with green materials like kitchen scraps. Follow this with a layer of brown material. Continue alternating between green and brown layers until your compost pile is about 1 meter high.
Add Water
Moisten your compost pile but be careful not to make it too wet. The compost pile should be as damp as a wrung-out sponge.
Turn Your Compost Pile
Use a garden fork or shovel to turn your compost pile every week. This helps to aerate the pile and speeds up the decomposition process.
Add Your Nitrogen Source
Sprinkle your nitrogen source over your compost pile. This could be green kitchen waste or a natural fertilizer like blood meal or bone meal.
Add Your Compost Starter
If you’re using a compost starter, add it now. This could be a handful of garden soil or finished compost.
Continue the Process
Continue adding layers of green and brown material, water, and your nitrogen source. Turn your compost pile regularly to keep it well aerated.
Wait
Now the hardest part – waiting. It can take anywhere from 2 weeks to 2 months for your compost to be ready depending on the materials you used and the conditions of your compost pile.
Tips and Tricks for a Successful Compost Accelerator
Making a DIY compost accelerator is not just about following the steps; it’s also about understanding the process and knowing how to ensure its success. Here are some tips and tricks to help you along:
Maintain the Right Balance
The ideal ratio of green to brown material in your compost pile is about 1:3. This ensures a good balance of nitrogen and carbon, which is crucial for effective composting.
Turn Your Compost Regularly
Regular turning helps aerate your compost pile and speeds up the decomposition process. Aim to turn your compost pile once a week.
Monitor Moisture Levels
Your compost pile should be as damp as a wrung-out sponge. If it’s too dry, add more water. If it’s too wet, add more brown material to absorb the excess moisture.
Cut Materials into Smaller Pieces
Smaller pieces decompose faster, so cut your kitchen scraps and yard waste into smaller pieces before adding them to your compost pile.
Avoid Adding Certain Materials
Not all organic materials are suitable for composting. Avoid adding meat, dairy, diseased plants, and pet waste as these can attract pests or create unpleasant odors.
Use Mature Compost to Speed Up the Process
Adding a layer of mature compost or garden soil to your compost pile can introduce microorganisms that speed up the decomposition process.
Be Patient
Composting is a natural process and it takes time. Don’t be discouraged if your compost pile doesn’t seem to be decomposing quickly. It will get there eventually!
Troubleshooting Common Issues with DIY Compost Accelerators
While making a DIY compost accelerator can be a straightforward process, it’s not uncommon to encounter issues along the way. Here are some common problems and how to fix them:
Compost Pile is Not Heating Up
If your compost pile isn’t heating up, it could be due to a lack of green material or nitrogen. Try adding more green kitchen scraps or a natural nitrogen source like blood meal or bone meal.
Compost Pile is Too Dry
If your compost pile is too dry, it can slow down the decomposition process. Try adding more water until the pile is as damp as a wrung-out sponge.
Compost Pile is Too Wet
Conversely, if your compost pile is too wet, it can drown the microorganisms that help with decomposition. Add more brown material to absorb the excess moisture.
Compost Pile Has a Bad Odor
A healthy compost pile should have a fresh, earthy smell. If your compost pile has a bad odor, it could be due to too much green material, not enough air, or the inclusion of inappropriate materials like meat or dairy. Try adding more brown material, turning your compost pile more frequently, and avoiding materials that can create bad odors.
Compost Pile is Attracting Pests
If your compost pile is attracting pests like rodents or flies, it could be due to the inclusion of inappropriate materials. Avoid adding materials like meat, dairy, or pet waste to your compost pile.
Compost is Decomposing Too Slowly
If your compost is taking too long to decompose, it could be due to a lack of green material, not enough water, or insufficient turning. Try adding more green material, moistening your compost pile, and turning it more frequently.
Conclusion
Embarking on the journey of creating your own compost accelerator at home is a fulfilling and sustainable choice. It not only provides you with an eco-friendly way to manage your kitchen and garden waste, but also produces nutrient-rich compost that can significantly improve the health and productivity of your garden.
From understanding the benefits of DIY compost accelerators, gathering the necessary materials, following the step-by-step guide, to troubleshooting common issues, this guide offers a comprehensive overview of the process. It demonstrates that with a little effort and patience, anyone can create their own compost accelerator.
Remember, composting is as much an art as it is a science. Don’t be afraid to experiment with different materials and techniques to see what works best in your unique circumstances. The rewards – both for your garden and for the environment – are well worth it.
So, why wait? Start your composting journey today and contribute towards a greener, healthier planet. Your garden will definitely thank you!

