How to Preserve the Harvest
Preserving the harvest is essential for many gardeners, farmers, and home cooks who want to enjoy the fruits of their labor all year round. It reduces food waste and allows you to savor the flavors of your favorite seasonal produce even when they’re not in season.
Additionally, preserving the harvest can be a cost-effective way to ensure you have a continuous supply of healthy, home-grown food and can serve as a creative outlet for experimenting with different preservation techniques.
How to Preserve the Harvest
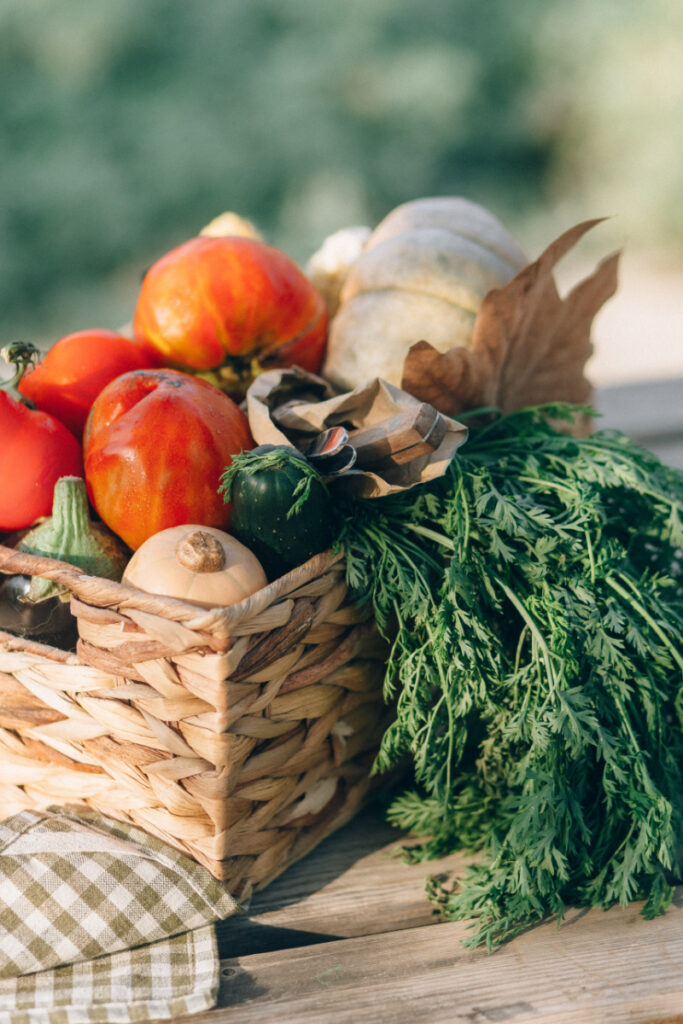
This guide will explore various methods of preserving the harvest, including drying, canning, freezing, fermenting, pickling, and proper storage techniques. Each method has its own unique benefits and is suitable for different types of foods.
By understanding these methods and learning how to preserve the harvest, you can extend the shelf life of your produce, maintain its nutritional value, and enjoy the delicious flavors of your hard work throughout the year!
Drying
Drying is one of the oldest and simplest methods of food preservation. It involves removing the moisture from foods, which inhibits the growth of bacteria, yeasts, and molds that cause spoilage.
Dried foods are lightweight, easy to store, and require no refrigeration, making them ideal for long-term storage or use in emergencies.
Explanation of the drying process
The drying process works by exposing foods to heat and airflow. As the heat evaporates the moisture, the airflow helps to carry it away, leaving behind a dried, preserved product.
The key to successful drying is maintaining a consistent temperature and airflow while avoiding direct sunlight, which can cause discoloration and loss of nutrients.
Types of foods suitable for drying
Many types of food can be dried, including fruits, vegetables, herbs, and even meats. Some popular dried foods include:
- Fruits: apples, apricots, bananas, cherries, peaches, and more.
- Vegetables: tomatoes, peppers, mushrooms, green beans, and more.
- Herbs: basil, parsley, cilantro, mint, and more.
- Meats: beef, poultry, and fish (also known as jerky).
Equipment needed for drying
There are several methods you can use to dry food, each requiring different equipment:
- Air drying: Requires a well-ventilated space and racks or screens for placing the food.
- Oven drying: Requires a conventional oven with adjustable temperature settings and racks or trays for placing the food.
- Dehydrator: A specialized appliance designed specifically for drying food, featuring adjustable temperature settings and multiple trays.
A step-by-step guide to drying food
- Choose fresh, high-quality produce or meats for drying.
- Wash and thoroughly clean the food.
- Cut the food into thin, uniform slices or pieces to ensure even drying.
- Pre-treat the food to prevent discoloration or spoilage (e.g., blanching vegetables or marinating meats) if necessary.
- Arrange the food in a single layer on racks, screens, or trays, allowing for adequate airflow between pieces.
- Set your chosen drying method to the appropriate temperature (usually between 130°F and 160°F) and begin drying.
- Monitor the progress of the drying process, rotating or turning the food as needed for even drying.
- Once the food is dehydrated and has reached the desired texture, remove it from the heat source and allow it to cool.
- Store the dried food in airtight containers, away from direct sunlight or extreme temperatures.
Tips for successful drying
- Choose the proper drying method for your needs, considering available space, equipment, and desired end product.
- Be patient, as the drying process can take anywhere from several hours to several days, depending on the type and thickness of the food.
- Keep a close eye on the food during the drying process to prevent over-drying or under-drying, which can affect the quality and shelf life of the final product.
- Experiment with different foods, seasonings, and drying techniques to find your preferred method and create a variety of delicious dried goods.
Canning
Canning is a popular and effective method of preserving food by sealing it in airtight containers, typically glass jars.
The canning process involves heating the food to kill any bacteria, yeasts, or molds that may be present and creating a vacuum seal to prevent decontamination.
Canned foods can last for years when properly stored and can be a convenient way to enjoy your favorite fruits, vegetables, and even meats throughout the year.
A brief history of canning
Canning was invented in the early 19th century by Frenchman Nicolas Appert as a means to preserve food for Napoleon’s army.
The technique has since evolved, with the introduction of the Mason jar in the mid-1800s and the development of pressure cookers, making canning more accessible and efficient for home use.
Types of canning: water bath and pressure canning
There are two primary canning methods: water bath and pressure canning.
- Water bath canning: Suitable for high-acid foods, such as fruits, pickles, jams, and jellies. This method involves submerging filled jars in boiling water, which heats the food and creates a vacuum seal.
- Pressure canning: Necessary for low-acid foods, such as vegetables, meats, and poultry. This method uses a specialized pressure cooker to heat the food at a higher temperature, effectively killing any bacteria or spores that may be present.
Foods suitable for each canning method
- Water bath canning: Fruits, tomatoes (with added acid), pickles, jams, jellies, and chutneys.
- Pressure canning: Vegetables, meats, poultry, fish, and soups.
Necessary equipment for canning
- Glass jars with two-piece lids (consisting of a flat lid and a screw band)
- A large pot with a rack (for water bath canning) or a pressure canner (for pressure canning)
- Jar lifter, funnel, and bubble remover/headspace tool
- Clean towels and pot holders
A step-by-step guide to canning
- Choose fresh, high-quality produce or meats for canning.
- Wash and sterilize your jars, lids, and screw bands.
- Prepare the food by washing, peeling, chopping, or cooking as needed.
- Pack the food into jars, leaving the appropriate headspace (usually 1/4 to 1/2 inch).
- Remove any air bubbles by running a non-metallic utensil around the inside of the jar.
- Wipe the rim of the jar clean and place the lid on top, securing it with the screw band.
- Process the jars using a water bath or pressure canning, following the recommended processing times for your specific food and altitude.
- Carefully remove the jars from the canner and allow them to cool undisturbed for 12 to 24 hours.
- Check the seals on the jars by pressing on the center of the lid. If the lid does not flex, the jar is properly sealed.
- Store the canned food in a cool, dark place away from direct sunlight or extreme temperatures.
Safety precautions and tips for successful canning
- Always follow tested recipes and guidelines for canning to ensure the safety and quality of your preserved foods.
- Use the appropriate canning method for the type of food you are preserving to prevent the growth of harmful bacteria, such as Clostridium botulinum, which can cause botulism.
- Inspect your jars and lids for any cracks, chips, or defects before using them, as these can compromise the seal and safety of your canned foods.
- Store your canned goods properly and discard any jars with bulging lids, leaks, or signs of spoilage.
- Practice good hygiene and cleanliness throughout the canning process to prevent contamination.
Fermenting
Fermenting is a natural preservation method involving food transformation by beneficial microorganisms, such as bacteria and yeasts.
These microorganisms convert sugars and starches in the food into acids, alcohol, or gases, which act as a natural preservative.
Fermented foods offer unique flavors and potential health benefits, making them a popular choice for those looking to preserve their harvest more traditionally.
Explanation of the fermentation process
During fermentation, the beneficial microorganisms present on the surface of the food or introduced through a starter culture break down the food’s sugars and starches.
This process creates byproducts such as lactic acid, acetic acid, or alcohol, which preserve the food by creating an inhospitable environment to harmful bacteria.
The process also produces carbon dioxide, which can cause the food to become bubbly or fizzy.
Health benefits of fermented foods
Fermented foods are rich in probiotics and live microorganisms that can support gut health and overall well-being. They may also help improve digestion, boost the immune system, and support nutrient absorption.
Fermented foods with potential health benefits include yogurt, sauerkraut, kimchi, and kombucha.
Types of foods suitable for fermenting
A wide variety of foods can be fermented, including:
- Vegetables: cabbage (sauerkraut), cucumbers (pickles), and radishes (kimchi)
- Fruits: apples (apple cider vinegar) and grapes (wine)
- Dairy: milk (yogurt and kefir)
- Grains: barley (beer) and rice (sake)
Equipment needed for fermenting
- Glass, ceramic, or food-grade plastic containers for fermenting
- Weights or fermentation lids to keep the food submerged in the liquid
- Airtight jars or bottles for storing the finished product
A step-by-step guide to fermenting food
- Choose fresh, high-quality produce for fermenting.
- Wash and prepare the food by chopping, grating, or crushing as needed.
- Mix the food with salt, sugar, or a starter culture, following a tested recipe for your chosen fermentation method.
- Pack the food mixture into a clean fermentation container, pressing down to remove air pockets and release the natural juices.
- Ensure the food is submerged in the liquid (brine or juice) to prevent mold growth. Use weights or a fermentation lid if necessary.
- Cover the container loosely to allow gases to escape while keeping out contaminants.
- Store the container in a cool, dark place to ferment for the recommended time, ranging from days to weeks or even months, depending on the specific food and desired flavor.
- Monitor the fermentation process, checking for signs of mold or spoilage and skimming off any surface scum if necessary.
- Once the fermentation is complete, transfer the finished product to airtight jars or bottles and store it in the refrigerator or another cool, dark place.
Tips for successful fermenting
- Always use clean, sanitized equipment and practice good hygiene throughout fermentation to prevent contamination.
- Follow tested recipes and guidelines for fermenting, as the correct balance of ingredients and conditions is crucial for a safe and successful fermentation.
- Be patient and give your fermented foods enough time to develop the desired flavors and textures.
- Experiment with different ingredients, seasonings, and fermentation times to create a variety of unique and delicious fermented foods.
Pickling
Pickling is a preservation method that involves immersing food in an acidic solution, usually vinegar or brine, to extend its shelf life and enhance its flavor. The acidic environment inhibits the growth of harmful bacteria, allowing the food to be stored for prolonged periods without spoiling.
Pickled foods offer a tangy, flavorful addition to meals and can creatively preserve various fruits, vegetables, and even proteins.
A brief history of pickling
Pickling has been a preservation method for thousands of years, dating back to ancient civilizations such as Egypt, Greece, and Rome.
It has since been adopted by cultures worldwide, resulting in diverse pickled foods and flavors.
Types of pickling
There are two main types of pickling — vinegar-based and brine-based:
- Vinegar-based pickling: This method involves immersing the food in a vinegar solution, often combined with sugar, salt, and various spices. The acidity of the vinegar preserves the food and imparts a tangy flavor.
- Brine-based pickling: Also known as lacto-fermentation or natural pickling, this method involves submerging the food in a saltwater brine. The naturally occurring lactic acid bacteria on the food’s surface convert the sugars into lactic acid, which acts as a preservative and gives the food a sour taste.
Foods suitable for pickling
A wide variety of foods can be pickled, including:
- Vegetables: cucumbers, green beans, cauliflower, carrots, and more
- Fruits: watermelon rinds, apples, pears, and more
- Proteins: eggs, fish, and even some meats
Equipment needed for pickling
- Glass jars with two-piece lids or airtight containers
- A large pot for preparing the pickling solution (if using vinegar-based pickling)
- Tongs, funnel, and a ladle
A step-by-step guide to pickling
- Choose fresh, high-quality produce or proteins for pickling.
- Wash and prepare the food by cutting, peeling, or trimming as needed.
- Following a tested recipe, prepare the pickling solution (vinegar- or brine-based).
- Pack the food into clean jars, leaving some headspace at the top.
- Pour the pickling solution over the food, ensuring it is fully submerged.
- Remove any air bubbles by tapping the jar or using a non-metallic utensil.
- Wipe the rim of the jar clean and place the lid on top, securing it with the screw band.
- For vinegar-based pickles, process the jars in a boiling water bath for the recommended time to create a vacuum seal and ensure a longer shelf life (optional but recommended).
- Allow the jars to cool undisturbed, and then check the seals.
- Store the pickled food in a cool, dark place for the recommended time (usually 1-4 weeks) to allow the flavors to develop before consuming.
Tips for successful pickling
- Always use clean, sanitized equipment and practice good hygiene throughout pickling to prevent contamination.
- Follow tested recipes and guidelines for pickling to ensure the safety and quality of your preserved foods.
- Experiment with different ingredients, spices, and pickling solutions to create a variety of unique and delicious pickled foods.
- Remember that the flavor of pickled foods will continue to develop over time, so be patient and allow them to reach their full potential before consuming them.
Storing
Proper storage techniques play a crucial role in preserving the freshness and quality of your harvest.
Proper storage techniques for various types of produce
Fruits
Most fruits should be stored at room temperature until ripe, then refrigerated to maintain freshness. Exceptions include bananas, tomatoes, and citrus fruits, which should never be refrigerated.
Store fruits separately from vegetables to prevent over-ripening due to ethylene gas production.
Vegetables
Store vegetables in a cool, dark, and well-ventilated area. Some vegetables, such as leafy greens, carrots, and celery, benefit from being stored in the refrigerator’s crisper drawer.
In contrast, potatoes, onions, and garlic should be stored in a cool, dark pantry or cupboard.
Herbs
Fresh herbs can be stored in the refrigerator, wrapped in a damp paper towel, and placed in an airtight container or plastic bag.
Alternatively, they can be stored upright in a glass of water, with the ends trimmed and a loose plastic bag covering the top.
Ideal storage conditions for different foods
- vinegar-based and brine-based Potatoes, sweet potatoes, onions, garlic, and winter squash
- vinegar-based and brine-based Root vegetables (carrots, beets, turnips), cabbage, and apples
- vinegar-based and brine-based Leafy greens, broccoli, cauliflower, peppers, and most other fruits and vegetables
Tips for preventing spoilage and maintaining freshness
- Inspect your products regularly and remove any spoiled or damaged items to prevent the spread of decay.
- Practice the “first in, first out” rule using older produce before newer items.
- Keep storage areas clean and well-organized to prevent mold and bacteria growth.
- Avoid washing produce before storage, as excess moisture can promote spoilage. Instead, wash it just before use.
- Store produce in proper containers, such as ventilated plastic bags or airtight containers, to maintain the ideal humidity levels and prevent cross-contamination.
Conclusion
By following these storage guidelines and techniques, you can ensure that your harvest remains fresh, flavorful, and nutritious for as long as possible, allowing you to enjoy the fruits of your labor throughout the year.

